

Give us a call (24/7) at

Proudly Serving the State of Wisconsin

The Homeowner’s Spring Checklist: How to Prevent a Wet Basement During Thaw Season

The Homeowner’s Spring Checklist: How to Prevent a Wet Basement During Thaw Season
In Wisconsin and across the upper Midwest, spring is more than just a season of renewal—it is a critical test for your home’s foundation. As the heavy snowpack begins to melt and the spring rains arrive, the soil surrounding your basement becomes saturated. This “thaw season” creates a perfect storm for water infiltration, often leading to damp walls, musty odors, or even catastrophic flooding. At Basement Repair Specialists LLC, we know that the best way to handle a basement emergency is to prevent it from happening in the first place. By following this proactive checklist, you can protect your home’s structural integrity and keep your lower level dry and usable year-round.

Why Spring is the “Danger Zone” for Wisconsin Basements

During the winter, the ground freezes deep into the earth. As temperatures rise, the top layer of soil thaws while the deeper layers remain frozen. This prevents meltwater from draining downward, forcing it to sit against your foundation walls. Coupled with the expansion of clay-rich soils, this creates hydrostatic pressure—a powerful force that pushes water through even the smallest hairline cracks in your concrete. Preparing for this pressure before the first major rain is essential.

Step 1: Inspect Your Gutters and Downspouts

Your first line of defense against a wet basement isn’t in the basement at all—it’s on your roof. Gutters that are clogged with autumn leaves or winter debris will overflow, dumping hundreds of gallons of water directly next to your foundation. This “roof runoff” is the primary cause of basement leaks. Ensure your gutters are clear and, most importantly, check your downspout extensions. Water should be discharged at least 6 to 10 feet away from your foundation. If your downspouts drop water right at the base of the wall, you are essentially inviting a flood into your home.

Step 2: Test Your Sump Pump Before the Rain Hits

Your sump pump is the heart of your waterproofing system. If it fails during a heavy spring downpour, your basement will likely take on water. Don’t wait for a storm to find out if it works. Pour a five-gallon bucket of water into the sump pit to ensure the float switch triggers the pump and that the water is being discharged properly outside.

Signs Your Sump Pump Is Ready for Replacement

  • Strange Noises: Rattling or grinding sounds suggest a failing motor or a damaged impeller.
  • Constant Cycling: If the pump runs even when there is little water, the switch may be stuck.
  • Age: Most sump pumps have a lifespan of 7 to 10 years. If yours is older, consider a proactive replacement.
  • No Battery Backup: Spring storms often bring power outages. Without a battery backup, your pump is useless when the lights go out.

Step 3: Check for Window Well Debris

Egress windows and standard basement windows often have wells that collect leaves, trash, and snow. If the drain at the bottom of the well is clogged, the well will fill up like a fish tank, eventually putting enough pressure on the window to cause a leak. Clear out any debris and ensure that your window well covers are secure and free of cracks.

Step 4: Evaluate Your Exterior Grading

Take a walk around the perimeter of your home. The ground should slope away from the foundation at a rate of about one inch per foot for the first six feet. Over time, soil “settles” next to the house, creating a negative grade that directs water toward the basement. Adding a few bags of clean fill dirt (not mulch, which holds water) to restore a positive slope can significantly reduce the moisture load on your walls.

When DIY Isn’t Enough: Professional Waterproofing Solutions

Sometimes, despite your best efforts, water still finds its way in. This usually indicates an internal problem that requires an engineered solution. At Basement Repair Specialists LLC, we specialize in high-performance waterproofing that goes beyond the surface.

The Benefits of Interior Drain Tile Systems

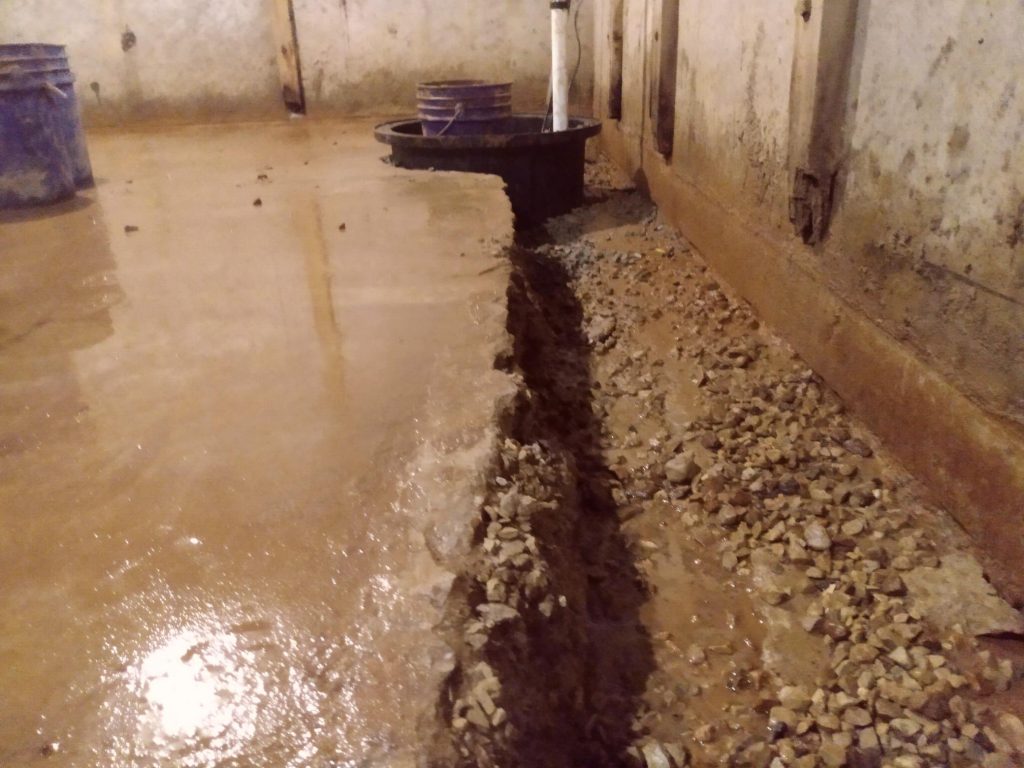
An interior drain tile system is the gold standard for long-term basement protection. By installing a perforated pipe beneath the basement floor, we can intercept water as it rises or seeps through the walls and direct it safely to the sump pump. This relieves the hydrostatic pressure that causes walls to bow and floors to crack, providing a permanent “A Great Job at a Great Price®.”

FAQ: Basement Maintenance

Why does my basement smell musty in the spring?

A musty odor is almost always a sign of high humidity or “capillary suction,” where moisture wicks through the porous concrete. This creates an environment where mold and mildew thrive. Professional dehumidification or crawlspace encapsulation can eliminate these odors at the source.

Is a small crack in the floor a problem?

Even thin floor cracks can be an entry point for moisture and radon gas. While they may not seem structural, they often indicate that water pressure is building up underneath the slab. It is best to have these inspected and sealed before they widen.

How often should I clean my sump pit?

We recommend checking your sump pit twice a year—once in the spring and once in the fall. Remove any silt, stones, or debris that could clog the pump intake and ensure the discharge line is clear of obstructions. Don’t let the spring thaw catch you off guard. Contact Basement Repair Specialists LLC today for a free home evaluation and stay dry this season!

Contact the Professionals at Basement Repair Specialists, LLC Today! (855) 554-7246